
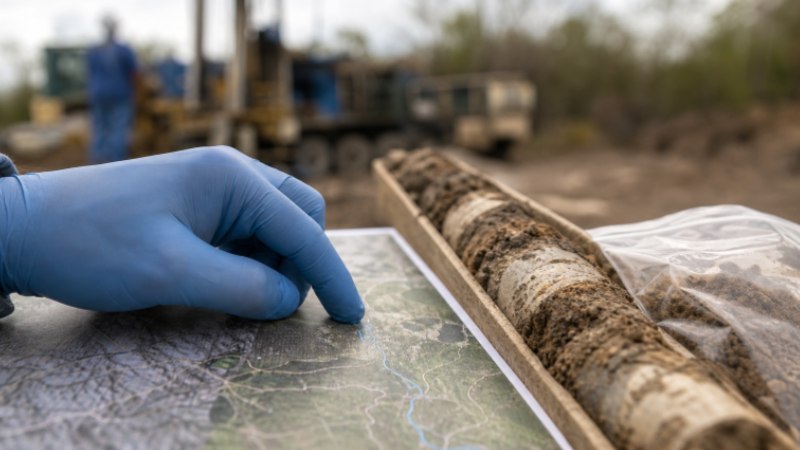
Commercial groundwater work involves far more than selecting a drill rig and choosing a location. A reliable project plan connects water demand, site conditions, well design, testing, safety, permits, and long-term maintenance before construction begins. Property owners, developers, facility managers, and environmental consultants can reduce expensive surprises by working with commercial water well drilling contractors in Western Pennsylvania early in the planning process. Early coordination helps identify access limits, testing needs, potential treatment requirements, and design changes before they affect the schedule.
Why Early Planning Matters
A commercial well may support potable water, irrigation, livestock operations, industrial processes, dewatering, or environmental monitoring. Each use creates different expectations for yield, water quality, construction materials, sampling, and reporting. Defining the purpose first prevents a project from being designed around assumptions that do not match the site or the end use. Planning also helps the project team identify risks before equipment arrives. A narrow drive, overhead electrical lines, shallow utilities, unstable soils, nearby streams, or a history of industrial activity can all affect cost and execution. Addressing those issues early is usually simpler than changing the plan after drilling has started.
Step 1: Define the Water or Investigation Goal
Start by documenting what the well or monitoring system must accomplish. For a production well, estimate average daily demand, peak demand, seasonal changes, storage needs, and any planned facility expansion. For investigation work, identify the contaminants or conditions of concern, the expected groundwater depth, and the information the sampling program must produce.
- Determine whether the project needs a production well, test well, observation well, or monitoring network.
- Identify applicable drinking water, process water, irrigation, or discharge requirements.
- Consider future pumping needs rather than designing only for current usage.
- Set clear performance targets for flow rate, drawdown, water quality, and recovery.
Step 2: Review Existing Site Information
Existing records often provide the fastest path to a better drilling plan. Review nearby well logs, groundwater mapping, previous geotechnical reports, environmental assessments, property surveys, and utility drawings. These materials can reveal likely soil and rock conditions, water-bearing zones, depth ranges, and possible construction constraints. Land-use history is especially important where fuel storage, manufacturing, chemical handling, landfills, or former industrial operations may have affected soil or groundwater. Also review drainage patterns, flood exposure, streams, easements, roads, buildings, and property boundaries. A good desktop review does not replace fieldwork, but it makes fieldwork more focused.
Step 3: Match the Drilling Method to the Site
The right method depends on formation type, drilling depth, access, sampling needs, borehole stability, and the final well design. No single method fits every commercial project.
- Hollow-stem auger: Often useful for soil investigations and many monitoring well installations.
- Air rotary: Commonly selected for harder formations, deeper work, and bedrock drilling.
- Mud rotary: Can help stabilize loose or water-bearing formations during drilling.
- Direct push: Useful for rapid, targeted sampling where site conditions and required depths allow.
- Core drilling: Provides continuous rock samples for engineering and geologic review.
Step 4: Plan Access, Safety, and Logistics
Before mobilization, confirm that the rig can enter, turn, level, and work safely at the selected location. Locate overhead and underground utilities, determine whether traffic control is needed, and reserve space for drill cuttings, water, tools, sample containers, and support vehicles. Active facilities may require work-hour restrictions, escort rules, indoor access plans, dust controls, spill prevention, or coordination with other contractors. A site-specific safety plan should address worker hazards as well as risks to employees, visitors, and nearby residents.
Step 5: Build Performance Testing into the Schedule
Drilling confirms that water is present, but it does not prove that the well can reliably meet commercial demand. Testing should be treated as a planned project phase, not an optional final task.
- Complete borehole and well construction.
- Develop the well to remove loose material and residual drilling fluids.
- Measure static water levels before pumping.
- Perform step-rate testing to observe drawdown at different flow rates.
- Conduct a longer pumping test to evaluate sustainable performance.
- Record recovery after pumping stops.
- Compare results with the expected peak and the daily demand.
Step 6: Test Water Quality Before Final Use
Laboratory testing should guide decisions about treatment, plumbing connections, and permitted use. Testing parameters depend on the intended purpose and local requirements, but may include bacteria, nitrate, metals, minerals, hardness, salts, pH, and site-specific compounds. Use clean sampling equipment, appropriate containers, accurate labels, and chain-of-custody records when required. A single sample is a useful starting point, but it may not represent seasonal changes or long-term conditions. Retesting is prudent after major repairs, flooding, treatment changes, or substantial changes in water use.
Step 7: Add Monitoring When the Site Calls for It
Monitoring wells help project teams evaluate groundwater elevation, flow direction, background conditions, and changes over time. During environmental investigations, the site assessment process can involve reviewing existing information, collecting field data, and installing groundwater monitoring wells where additional characterization is needed. Well locations should fit the project’s conceptual site model. Upgradient wells may establish background conditions, while other wells may be placed near source areas, property boundaries, or likely groundwater flow paths. Record depth, screen interval, casing type, sealing details, and survey elevation so future sampling results can be interpreted correctly.
Step 8: Protect the Well After Construction
A commercial groundwater system needs protection after the rig leaves. Use a secure, sanitary cap; direct surface runoff away from the wellhead; protect the area from vehicle and chemical storage; and keep pumps, controls, tanks, and treatment equipment on a routine inspection schedule. For monitoring systems, well construction must match the sampling objective and site geology. The EPA’s monitoring well design guidance reinforces the importance of selecting appropriate construction and installation details for representative groundwater samples.
Permits, Records, and Compliance
Requirements vary by state, county, well type, withdrawal volume, and intended use. Owners should retain well-construction records, drilling and lithology logs, pumping-test data, laboratory reports, survey maps, waste-handling records, permit approvals, inspection notes, and abandonment documentation, when applicable.
Questions to Ask Before Hiring a Drilling Team
- Which drilling methods fit the expected geology and access conditions?
- What testing will verify yield, recovery, and water quality?
- Who will manage permits, utility coordination, samples, and agency communication?
- How will cuttings, drilling fluids, and investigation-derived waste be handled?
- What reports, logs, maps, and maintenance recommendations will be delivered?
Common Planning Mistakes
Common problems include designing for average rather than peak demand, choosing a drilling method before reviewing site data, skipping pumping tests, buying treatment equipment before receiving laboratory results, and leaving access or utility issues until the last minute. Another costly mistake is failing to document construction details that future operators need for maintenance or repair.
How to Compare Project Proposals
Compare proposals line by line instead of selecting only the lowest price. Confirm what is included for drilling, casing, development, testing, sampling, permits, cleanup, reporting, and site restoration. Ask how the team will address low yield, unexpected rock, poor water quality, failed borings, or necessary change orders. Clear scope language and a named project contact are often signs of a better-managed project.
Conclusion
Successful commercial groundwater projects treat drilling, testing, safety, permitting, and maintenance as a single, integrated process rather than as separate tasks. By defining water demand early, reviewing site conditions, evaluating groundwater availability, and selecting the right drilling approach, project owners can reduce delays and unexpected costs. Proper testing also helps verify well performance, water quality, and the system’s ability to meet operational needs reliably. Compliance with local permits and environmental requirements should be addressed before construction begins. Once the well is completed, regular inspection, maintenance, and monitoring can help identify problems before they become expensive failures. Protecting the wellhead and surrounding area is equally important for maintaining water quality and system reliability. A carefully planned approach gives commercial operators greater confidence in their investment while creating a dependable groundwater source that can support daily operations for years to come.